Illustrated step-by-step instructions to get you started beading on The Ricks Beading Loom.
(For video instruction, please check out these free video tutorials.)
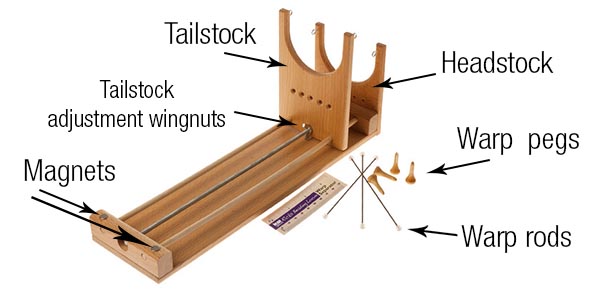
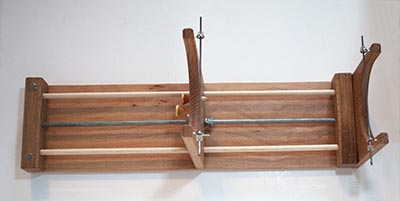
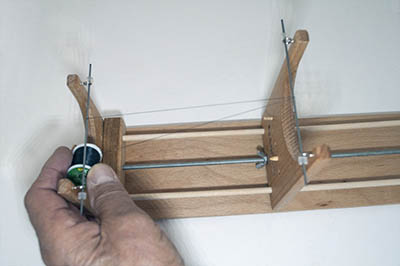
Step 1: Install warp rods.
Remove the rubber cap from one end of a rod, place the rod through both screw eyes on the inside of the tailstock and replace the rubber cap. Repeat these same steps to install a rod on the headstock.
Note: There is one extra rod as a spare.
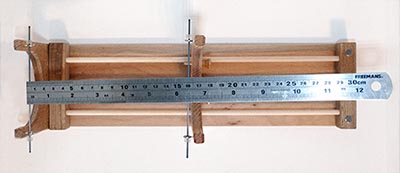
Step 2: Adjust for length
Determine the length of the body of your project. For a bracelet, that would be the length without any tapering on the ends or a clasp.
Loosen the tailstock adjustment wingnuts and slide the tailstock in or out to the approximate desired position. Lay a ruler on the warp rods. Be certain to measure from the outside of each warp rod. Turn the appropriate wingnut until the tailstock is properly positioned. To hold the tailstock in place, tighten the wingnuts until they are pretty snug.
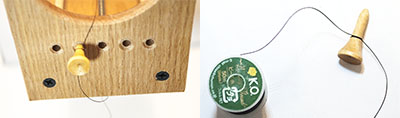
Step 3: Attach the warp thread to a warp peg
Note: The warp thread is the thread that run lengthwise on the loom. The weft is the thread that runs laterally and holds the beads.
Insert the peg into the second (from left) hole in the headstock.

Step 4: Warping the Loom
Unless you are using a very large spool of thread or reel of FireLine™, you can keep the thread on the bobbin or spool. If the spool (or reel) will not fit under the warp rod, cut off enough warping material to warp the loom. The amount you cut off will, of course, depend on how wide and how long your finished product will be.
Pass the thread OVER the headstock warp rod and around the tailstock rod to create the first warp, next back UNDER and around the headstock warp (second warp), and then OVER the tailstock rod (third warp). Repeat until you have placed the required number of warps on your loom. Remember you will need one warp MORE than the number of beads in the width of your project. For example, if your project is eight beads wide, you will need nine warps.
The last warp thread MUST go over a warp rod, so if it looks like your last warp should be under the rod, go over the top anyway! NOTE: With an even number of warps, you will end on the headstock, and with an odd number of warps, you will end on the tailstock.
After you finish creating the warps, attach the end of the thread to another warp peg as you did in step 3 and insert it into a peg hole below it. NOTE: When wrapping the warps around the warp rods, do not allow them to become tangled and keep a fair amount of tension on the warps. After you attach the thread to the peg, you can adjust the tension by turning the peg (before you insert in the hold very tightly) , much like tuning a stringed instrument.
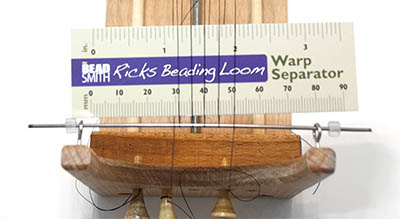
Step 5: Separating the warps
In your kit you will find a plastic-coated card called a “warp separator.” (Note: If you ever lose your warp separator, half of a business card — or better yet, half of an old playing card — will work just fine.) Take the warp separator card and place it OVER the leftmost warp (which should be coming over the top of the warp rod), then UNDER the next warp, over the next, and continuing on until you have passed over and under all of your warps. Slide the warp separator back against the headstock rod.